Introducción
Jambo for Outlook allows you to log emails and events as communication records within your Jambo project. When using the Outlook add-in to create a Jambo communication record, you can complete additional fields, making a more complete record easier.
System requirements (v1.3.7 - updated July 2025)
Jambo for Outlook uses Outlook JavaScript API requirements set 1.12.
To see if your version of Outlook is supported, please visit this link.
Jambo also requires access to the Graph API. This may require your organizational admin to enable access.
Installing Jambo for Outlook
Recommended installation process:
It is recommended that the Jambo for Outlook Add-in is installed by an organizational admin.
Note: The Jambo for Outlook Add-in has features that use event base activation (SmartAlert) to help users add emails to Jambo at the time of sending the email. According to Microsoft documentation (https://learn.microsoft.com/en-us/office/dev/add-ins/publish/autolaunch-store-options) “Add-ins must be deployed by an organization's admins for end-users to access the event-based activation feature”
Contact your IT administrator to perform the following steps
Step 1: Go to Microsoft 365 admin center

Step 2: Click on Get apps

This will open AppSource

Step 3: Search for Jambo

Step 4: Click get it now and agree to terms of use and privacy policy

Step 5: Add Users
You can add to your entire organization or to specific users and groups

Step 6: Access permission request

Step 7:
Review and finish deployment


Note: This can take a while (up to 72 hours) for the add-in to be deployed to all users.
Install from in-app Microsoft 365 Store and Copilot store:
Note: Installing using this method can cause issues with the on message send functionality. If you are only using the add-in to send existing emails to Jambo than you can install it directly from the store.
Install Jambo for Outlook from the Outlook from the in-app Microsoft 365 store, which can be accessed from your ribbon within Outlook.

- Search for Jambo.
- Click the 'Add' button on the store page.
If you can't install add-ins, you can contact your IT services. Jambo's customer success team can help your IT team get the information they need for admin-managed add-ins; email us at support@jambo.cloud.
Accessing Jambo for Outlook
Once installed, you can access Jambo for Outlook whenever you view a new or existing email.
Windows: New Outlook and Outlook on the Web
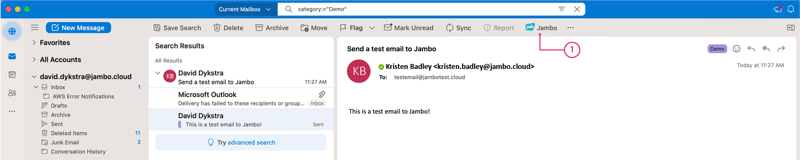
In Outlook on the web and New Outlook on Windows, Jambo for Outlook can be accessed in the toolbar or in the top right of an email that you are viewing, If you have multiple add-ins it may be hidden in the ellipses menu (three dots) in the upper right corner of the email actions bar, next to the reply, reply all, and forward actions.

Windows: Outlook (Classic) UPDATED (July 2025)
Note: The ribbon may be hidden for some users when viewing existing emails. To restore the ribbon, click or double click the “Home” menu item.

You will then see Jambo in the ribbon

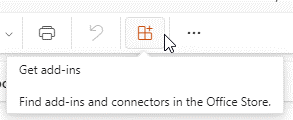
In Windows Outlook (Classic), if you have lots of items in your ribbon and are using the simplified ribbon Jambo for Outlook can be accessed via the ellipses (three dots) located in your home ribbon.

Alternatively, it might already be pinned to your ribbon.
Collapsed home ribbon
![]()
Expanded home ribbon

Outlook 2019 or later on Mac and Outlook on Mac (Microsoft 365)
In Outlook 2019 or later on Mac and Outlook on Mac (Microsoft 365), you can access Jambo for Outlook from the upper ribbon or the ellipsis (three dots) menu to the ribbon's far right.
Pinning Jambo for Outlook
Once opened, you can pin Jambo for Outlook in place, so you don't have to open the add-in every time you switch to a new email.

Logging in to Jambo
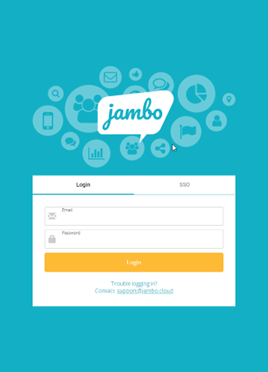
To use Jambo for Outlook, you must log in to Jambo through the add-in's login screen. First, select the region your account is in, then click login.

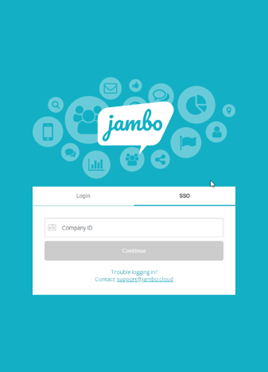
You will log in using the same credentials you use when logging in through your browser. If you are set up using SSO, you will use the same company ID and credentials.
Settings
When you click on the gear icon in the bottom right, you will see two options: Settings and Logout.
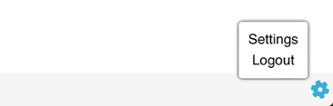
If you click settings, you will see the following.

Here, you can change your default region. This will be automatically selected for you the next time you log in.
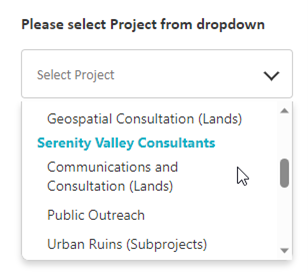
Selecting your project
Once logged in, select the project to which you would like to log emails. You may only access projects through Jambo for Outlook, where you have permission to create communications and contacts.
Logging an email to Jambo
Once you have selected a project, you can log the open email to that project by clicking the "Log it in Jambo" button.
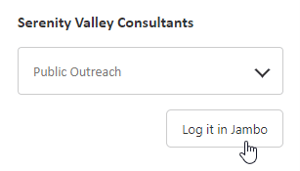
Logging it in Jambo will open the communication record form and allow you to add additional details.
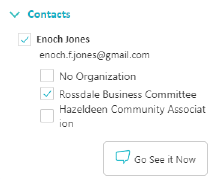
Contacts
The Contacts section will be populated automatically with individuals and organizations based on the emails in the From, To, and Cc fields. Existing contacts will be marked with a checkbox, and any checked contacts will be automatically added to the communication record. Contacts in the Bcc field will only be added to your record when creating a new email; any contacts in the Bcc field on emails you add from your sent folder will not be added. The Bcc field is not included in the PDF version of your email that gets added to Jambo as an attachment.
Contacts not in the project that will not be added to the communication record will show "Excluded Contact."

Automatic contact creation
Automatic contact creation is a pack that is part of Jambo's suite of automatic record creation tools. This feature simplifies the process of importing contacts from automatic communication creation. It automatically creates and adds any missing contacts to the created communication record.
If your account has automatic contact creation enabled, Jambo for Outlook, instead of "Excluded Contact," will show "New Contact".

If you do not want to include that contact in the communication record, uncheck the checkbox to the left.
To ensure that the data entered is accurate, the automatic contact creation pack has a feature that checks for duplicates. This feature uses duplicate check permission to determine if contacts exist outside the current project. If the user does not have duplicate check permission, the automatic contact creation process will only search for contacts within the project. If the contact is not found within the project, it will create a new one.
However, if the user has duplicate check permission, the automatic contact creation will search the entire account for contacts with the same email address and include the details linked to the contact for this project.
Automatic contact creation offers an email and domain exclusion list, which account admins can only edit. This feature prevents the automatic creation of a contact with an email address in the exclusion list or matches a domain in the exclusion list.
Please refer to Jambo's helpdesk documentation for more information on how to enable this feature.
Representatives
If an email address is associated with a representative in your project, that email will only appear in the contacts section if it is already in the list of contacts in Jambo. The representative will automatically be selected in the representatives drop-down.

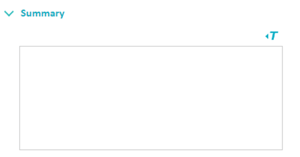
Summary
The summary section in this field is the same as in the Jambo web application. Anything entered here will be added to the communication record summary in Jambo.
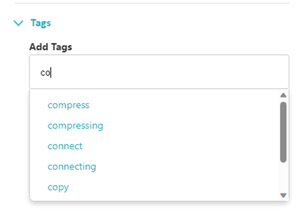
Tags
The tags section in the form allows you to select from a predefined list of global and project tags or add new tags depending on the project's configuration.
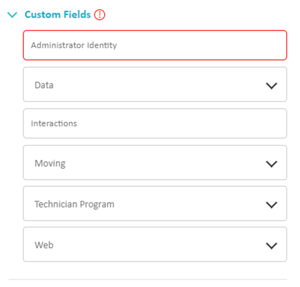
Campos personalizados
All custom fields on communication records available for the project will be available here. If the field is mandatory, the user must fill it out before adding it to Jambo.
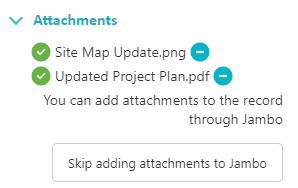
Attachments
Attachments in the email will automatically be added to the communication. If you don't want specific attachments, you can selectively choose which attachments will not be added by simply clicking on the "-" next to the attachment. A PDF copy of your email will be added to the communication record attachment section in Jambo. The PDF will include all attachments from the email, even if you've chosen not to add it to Jambo.
Pack fields
Packs enabled on the project that include fields impacting the communication record are also available in Jambo for Outlook.
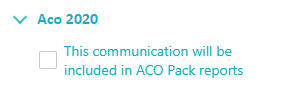
ACO pack
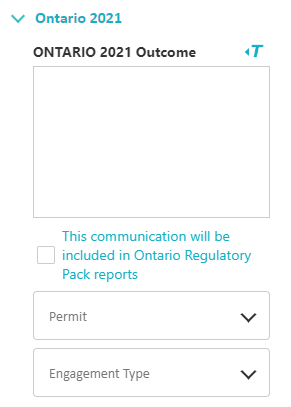
Ontario pack
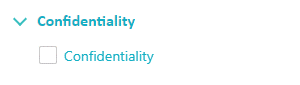
Confidentiality
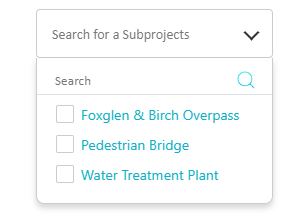
Subproyectos
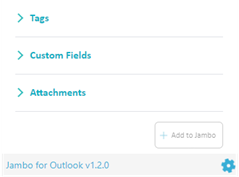
Add to Jambo vs. trim and add to Jambo
Once you have completed all the necessary fields, you can choose to "Add to Jambo", which will add the entire email and the full conversation chain to Jambo, or you can "Trim and add to Jambo," which will take only the most recent email within the chain.

Warning for Multiple Windows
The add-in will not work as expected if you have multiple windows open at the same time.

Logging Emails when Sending
hen sending an email to a contact and using Jambo for Outlook to create a communication record at the same time, instead of logging the email after the fact, you can trigger the communication record creation process when you hit send by ensuring that the "Log to Jambo project when sent" check box is enabled. Jambo will confirm that the record has been created and let you know if you want to finish sending the email.

Note: In order for this feature to work correctly, this feature requires the add-in to have been installed by your organizational admin.
Caution: If you are using Windows Outlook (Classic) –If you click the “Log to Jambo“ button and change your mind, you need to uncheck the “Log to Jambo project when sent” checkbox. Closing the add-in will not stop the add-in from sending the email to Jambo.
Caution: If you are using Outlook for Mac, the New Email window needs to pop out, otherwise the email will not be added to Jambo when you send it.
You can set the new email window to pop out automatically in the settings:

Click on Composing

Then check the "Open new messages and replies in a separate window" checkbox.

Checking for an existing record
When you select "Log to Jambo," Jambo will check to see if the email has already been logged in the project you are currently in.
Jambo checks:
- Subject
- Date and time
- For at least one shared contact (email)
If all these criteria match, Jambo will determine that the record is already logged and suggest you check the communication record in Jambo before logging it again.
Adding an event to Jambo
To add events to Jambo, this feature requires access to the Graph API. You may be asked to log into your microsoft account again in order use this feature.

Click Sign In and follow the prompts.
You may also be told that you do not have access, you may need to contact your IT organization admin to grant you access in order to use this feature.
Details Section
The details section highlights the information that Jambo will attribute to the communication record.
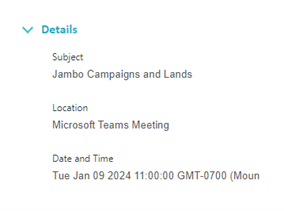
- Subject - will become the subject of the communication.
- Location - is added to the communication record locations section as a custom location.
- Data and time - will become the communication's date and time. It's important to note that Jambo uses the beginning of the event in Outlook to set the date and time in Jambo. So, multi-day events will appear on the first day.
Communication Method
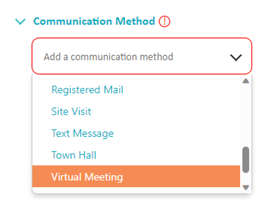
Since events can be anything, you can also set the communication method when working with events. It's important to remember that the communication method field is required, and Jambo cannot create a communication record for you without this information.
Inbound Events
Once you've added an event you're invited to, you can add the event to Jambo the same way you add an event you created yourself.
You can also add events that've been forwarded to you. As you don't appear on the event invitation list, Jambo can't automatically assign you as a representative. You must update the representative's list before saving the communication record.
Events Already Added to Jambo (v1.3.0 - updated April 2024)
Since events can have many Jambo users as attendees, before allowing you to log the event to Jambo as a communication record, Jambo will check to see if the record already exists in the project, even if the event wasn't logged to Jambo by you.
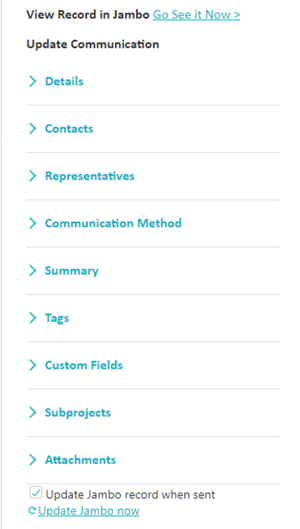
If Jambo finds an existing record, you can make changes to the event, change the fields, and update the record right away by clicking 'Update Jambo now 'or when you send out the changes. This makes it easy to update the record right away.
Note: Updating a record is only available for events and not for emails.
Field Changes (v1.3.0 - added April 2024)
Whenever changes are made to a field, the section will show an updated icon to indicate that changes have been made.
![]()
Newly added contacts will be highlighted with an (!) indicator.
![]()
Removed contacts will be highlighted with an (X) indicator.
![]()
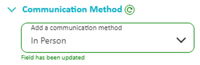
Field changes will be highlighted with text saying the field has been updated.
Changes Detected Warning (v1.3.0 - added April 2024)
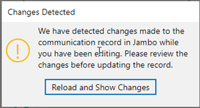
You may see this warning pop up from time to time. This occurs when someone edits the same record in Jambo while you are trying to edit it in Outlook at the same time.
Preguntas frecuentes
Why did I lose my work when I closed the task panel in the add-in?
If you close Jambo for Outlook after entering information, you will lose that information when the Jambo for Outlook task panel reloads. Please finish and send your Jambo record before switching to a new email. Or pop the email out into a new tab.
My contact doesn't exist in my project; what do I do?
If your contact (Individual or Organization) isn't found, please log into Jambo online and add the contact to your account and project before you use them in Jambo for Outlook. If need be, you can always add them after the fact to the record in Jambo.
I created a record for an email from my sent folder; why didn't the add-in pick up those contacts in the Bcc field?
Outlook add-ins cannot pick up emails that appear in the Bcc field after the email has been sent. When sending an email with contacts in the Bcc field you would like included on the Jambo communication record, create the record while you compose the email.
Uninstalling Jambo for Outlook
You can uninstall Jambo for Outlook at any time via the Microsoft Office Store, which can be accessed from your ribbon in Outlook.
- Once you have opened the Microsoft Office Store, navigate to "My add-ins" from the navigation on the left-hand side.
- Scroll down to Jambo for Outlook. Select the three dots located in the bottom right corner of the Jambo for Outlook card.
- From the available menu, select remove.
Are you looking for more help? Please check out the Jambo Knowledge Hub or contact our Customer Success team.